How to Sharpen Photo without Increasing Noise Visibility
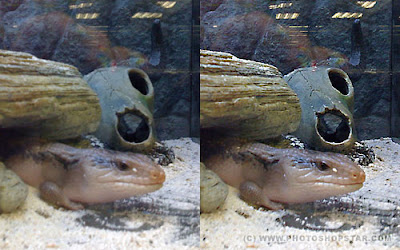

Sometimes it happens that we need to sharpen photos for which there is noise, for example, pictures taken at night. But overall increase in photo sharpness increases and the noise visibility also. How to be in this situation? I can show you one method in Photoshop, how to avoid it.

First of all you should find some appropriate photo to work with. I prefer to use this one below.

Open up this photo and start the tutorial. Go to Channel panel (Window > Channels). The first step is to look at the channels palette and determine which color channel best represents the area we want to capture. To the right, shown from top to bottom, you can see the red, blue, and green channels for this image. It’s obvious that the red channel contains the most information because it is most light. Click on the red channel and drag it down to the new channel button to create copy of it.
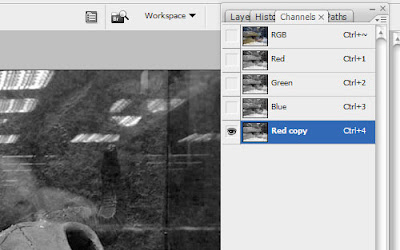
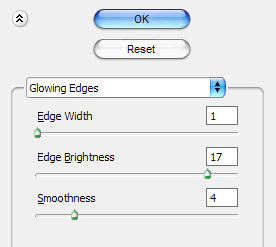
We got the copy as you can se on the above picture. Then apply for copied channel Filter > Stylize > Glowing Edges with similar settings to these:
Now we have effect like this:
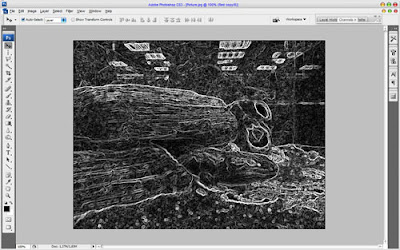
Hold the Ctrl button and click the Red copy thumbnail in the channels palette to load selection of this channel.
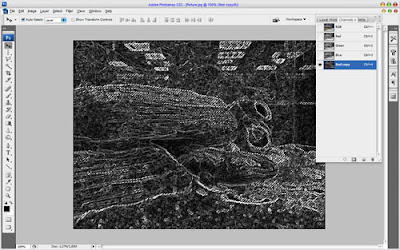
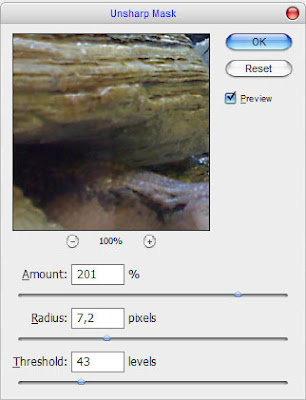
After that we can delete this channel: click on the Red copy channel and drag it down to the delete current channel button to delete it. Then go to layers palette (Window > Layers) and press Ctrl+H to hide selection temporary, but don’t remove selection for now! It is important! Then apply Filter > Sharpen > Unsharp Mask with some suitable presets for the photo. Pay your attention that for each photo presets should be individual. I tried following presets:
See the result now:
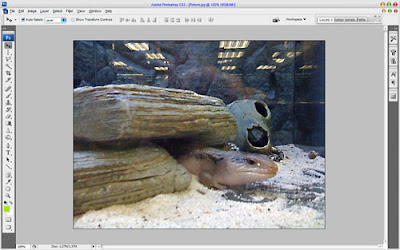
Now, we have some selected area, but it is hidden for now, press Ctrl+H again to make it visible. Then press Ctrl+J to duplicate selected area to new layer. Then apply Filter > Sharpen > Sharpen Edges:
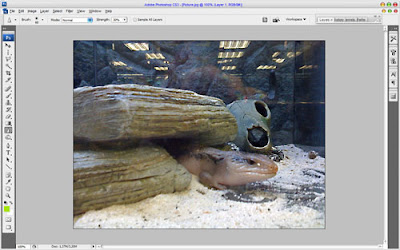
That is it for now. We sharpened photo without increasing the noise visibility. Hope, you got some interesting knowledge from this tutorial.

Fairness Cream - Before and After Effect

In this tutorial we will take close up of a face with dark complexion and turn into a significantly lighter tone to create an after effect of using the cream. This effect can be performed on any part of the body.

1. We need to choose image, I picked up the one below, with a darker skin (to achieve better effect).

2. Now, we need to create the selection of area of face on which we are going to work. You can choose any selection method you want. For this image magnetic lasso would be a great time saving selection tool.

3. Using magnetic lasso tool, click on any starting point on the boundary of her face. Then just keep moving on sides of the skin area till you reach the starting point again.

4. Once you complete it, this will convert into a selection as shown below.

5. Now press Ctrl+Alt+D to feather the selection. Set Feather Radius to 10. Just like shown on picture below.

The selection will smoothen up as shown below.

6. Now we need to copy and paste our selection in a new layer. Do that by pressing Ctrl+C and then Ctrl+V, and you should have a new layer containing only skin we’ve selected before.
Stay on this new layer and go to Image menu select Adjustments>>Brightness/Contrast. (see the picture below)

Increase brightness to a high value. Tick the “Preview” box (if it isn’t ticked already) and you will see the effect in action in real time. See the image below to check settings I used.
Note that, this values may not be perfect for your pictures so it’s the best for you to choose them as you wish or like

7. From Image menu select Adjustment>>Selective color (just like shown on picture).

Make sure, selected color range is Reds on top. Then reduce Black to a large negative value as shown below. You may also try reducing cyan too and see in the preview if its lightens the skin color.

8. Again from Image menu select Adjustments >> Curves or press Ctrl+M to open curves editor. Click in center and drag a little upwards. Don’t overdo this or else the image will look burnt. Take a look at the picture below.

Now in Layers window duplicate the face layer and go to Image > Adjustments > Brightness/Contrast. Increase brightness to an insanely high value.

Go to Layers window once again and change layer mode (on duplicated layer) to Color burn.

And voila! You’ve done it.
Here’s my result.

A closer look (before & after).

JAlbum

License        :Free
Added          :July 9, 2004
Updated       :March 16, 2010
Publisher      :Website
File size       :13.5 MB
With a good set of editing tools, and a straightforward process, the free JAlbum makes for a great way of creating photo albums to share with your friends.

Languages: English, Spanish, German, French, Catalan, Chinese Simp, Italian

Recent changes in JAlbum:

* Skin developers now have a handy skin property editor located under Tools->Skin developer. Thank you Tom for this addition!
* Some skins were not installed correctly - were missing files. Since v8.5
* Previewing albums or opening file system folders from within Jalbum was broken for some users (Suspected bug in new Java 1.6 java.awt.Desktop API). Since 8.7
* Bundled skin Chameleon had a bug which corrupts the album generation with pictures holding no metadata

OS requirements for JAlbum:  WinXP/2003/Vista/7


Pros

* Good set of editing tools
* Browsing for pictures
* Lots of album styles

Cons

* Interface can feel crowded

download

Picasa

License             : Free
Added              : December 14, 2006
Updated           : February 24, 2010
Publisher          : Website
File size            : 11.7 MB

The all-new Picasa has successfully completed what it seemed a difficult task: improving a software app that was already very good.

Languages: English

Recent changes in Picasa:

* Collaborative albums -- Upload from Picasa -- In August 2009, we introduced collaborative albums in Picasa Web Albums. Now you can upload to a friend's album directly from the Picasa software.
* Add name tags -- Picasa scans all the photos in your collection, identifies the ones with faces, and groups photos with similar faces together
* Geotag your photos with Google Maps -- Quickly add geotags using the newly integrated Google Maps.
* Import, upload, and share, all at once -- We've improved the import process so that you can star your favorites, upload to Picasa Web Albums, and share with Google contact groups at the same time.
* Tags -- Better bulk tagging, quick tags & tag counts -- We've improved the tagging experience.

OS requirements for Picasa:

* OS: WinXP/Vista


download

make member card with action 2

How to make member card with action

download  member card lifted

first load action into photoshop


then play the action


result

make member card with action 1

How to make member card with action

download  member card front and back

first load action into photoshop


then play the action


result