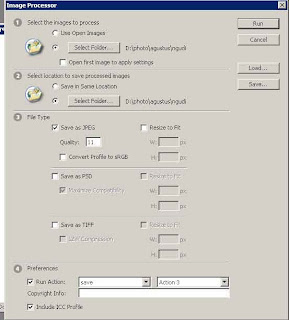
Easy Convert RAW with Image Processor

Top Ten Photoshop Text Effect Actios

Snow Effect

snow effect.


get snow effect with photoshop, simple photoshop effect just use hue/saturation and color dodge blending mode.

1.open image to photoshop


2.duplicate layer (ctrl + J)


3. change blending mode from normal to color dodge


4. go to Hue/Saturation (ctrl + U)

apply these setting


5. duplicate layer (ctrl+J)


result


before save, don't forget to flatten image.

download snow effect action
http://rapidshare.com/files/278630095/snow_effect.atn

Win Over $3,000 in Prizes!

With the launch of RoyalTutorial.com now underway, we just had to celebrate in style! We’re only as awesome as the people who contribute and read our web site, and we wanted to kick things off by giving away some killer prizes to spread the word around on our new site. Over $3,000 in prizes are up for grabs, which will be awarded to 45 different winners! It’s ridiculously easy to win, so get your entries in now!

Here are the prizes up for grabs!

Prize: Wacom Intuous4 Small Pen Tablet – Retail: $229.00
Provided by ClickBooth.

Prize: Pixelmator Software – Retail: $59.95
Provided by Pixelmator.

Prize: Pixelmator Software – Retail: $149.95
Provided by MarketLeverage.

Prize: WooTheme Membership – Retail: $70.00
Provided by WooThemes.

Prize: ThemeWars Membership – Retail: $147 + $20/month
Provided by ThemeWars.

Prize: RoyalTutorial.com T-Shirt – Retail: $9.95

Three ways to enter… Three ways to win! Winners will be selected weekly from entries through Twitter (retweet), Blogging (post article and link) and Commenting (one comment entry per person). Enter all three ways to increase your odds of winning.

Here’s how:
1.) TWITTER: Simply RETWEET this POST by clicking here, or the RETWEET button at the top or bottom of the post!

2.) BLOG ABOUT IT: Write a Blog Post about this Contest, and link to this post page.

3.) COMMENT TO THIS POST: Leave a comment on this post about the prize you would like to win and why.

Winners will be selected and posted on a weekly basis, and posted on this page. Winners from the first and third weeks of the contest, will be selected from Twitter entries. Weeks two and four will be through comments left on this post. All contest winners will randomly be selected by random.org. This contest promotion is open to all US/CANADA residents, and runs from August 12, 2009 through September 16, 2009.

Prize drawings will be selected on the following dates:

9/2/09TWITTER WINNERS
- Flip Digital Camera (1 winner)
- WooThemes Account (2 winners)
- ThemeWars Account (1 winner)
- Royal Tutorial T-Shirt (5 winners)

9/16/09COMMENT WINNERS
- Flip Digital Camera (1 winner)
- WooThemes Account (2 winners)
- ThemeWars Account (1 winner)
- Royal Tutorial T-Shirt (5 winners)

9/23/09TWITTER WINNERS
- Flip Digital Camera (1 winner)
- WooThemes Account (2 winners)
- ThemeWars Account (1 winner)
- Royal Tutorial T-Shirt (5 winners)

9/30/09COMMENT WINNERS
- Pixelmator (1 winner)
- Flip Digital Camera (1 winner)
- WooThemes Account (2 winners)
- ThemeWars Account (1 winner)
- Royal Tutorial T-Shirt (5 winners)

10/7/09RANDOM Twitter/Comment/Blog WINNERS
- Wacom Pen Tablet (1 Grand Prize Winner)
- Pixelmator (1 winner)
- Flip Digital Camera (1 winner)
- WooThemes Account (2 winners)
- ThemeWars Account (1 winner)
- Royal Tutorial T-Shirt (5 winners)

Good luck!
How to make a colorful abstract background

Golden Glow Effect

This tutorial will teaches you how to create Golden Glow Effect.

Step 1: First open an image.


Step 2: Duplicate the layer by pressing Ctrl+J. Click add layer mask button from the bottom of the layer palette.


Step 3: Select the mask thumbnail if not selected. Go to Image> Apply Image and use these settings:


Step 4: Now go to Filter> Noise> Median and set the radius 7.


Step 5: Go to Filter> Stylize> Find Edges.

Step 6: Now go to Filter> Blur> Gaussian Blur and apply these settings:


Step 7: Change the layer blending mode to 'Linear Light' and Opacity to '70%'.


Step 8: Duplicate the only Image layer (not with mask layer, if mask layer duplicate with image layer, delete the mask layer).
Go to Filter> Render> Lighting and apply these settings:


Step 8: Set the new duplicated layer blending mode to 'Overlay' and Opacity to '70%'.

Make Gothic Picture [Best Photo Effect]

To get started, pick a picture you want to manipulate, or use this same one.


1. Use the tool named Dodge Tool to get a whiter effect over the skin. You can find it in the left tool bar.


I usually use that tool in a %45 exposure.


2. Now we will desaturate the skin color with the Sponge Tool also in the left tool bar. %100 flow.

Look for it in the same place where the Dodge Tool is, you just have to click over it, and you will see another two options hidden in the same place. (my english sucks, I know it, but try to follow…)


Now that the skin looks dead enough, will work on the eyes.


3. Now pick the Dodge Tool again, and apply it over the eyes.


4. Pick a color you like for the eyes. I like light blue…

Use the color with an opacity of %18, we don't want to lose all the little details of the eye.


5. If you want to add more light to the eye, use a regular brush, white color, and select Mode: Color Dodge %35 opacity.


Like this…


6. Now the make up…

Black color, opacity %18, and apply it around the eye a few times. Darker in the center, and softer on the edges.


7. You can also work on the mouth with the Burn Tool also placed below the Dodge Tool.
This tool is very good when you need to add shadows or you want something to look darker. Also, don't forget to use the Blur Tool to correct the skin, and make it look softer and silky.