Change Eye Color
This tutorial will explain how to change the eye color in 5 steps.
After this tutorial for beginners, you can create a really cool effect in just a few minutes.
End Result:
STEP 1:
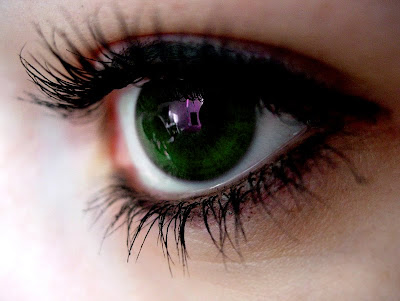
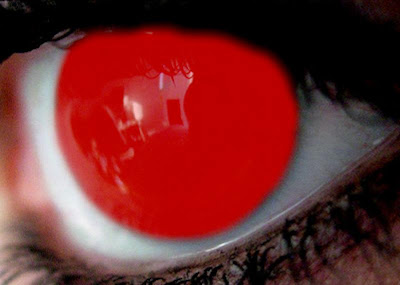
Start with opening the picture you would like to change.
These are the pictures i used for this example.
Zoom in to the eye by pressing (Z) and clicking the eye.
STEP 2:
Click (Q) to open up the “Quick Mask Mode”, and press (B) or click the brush tool brush.
Now fill the eye area you would like to change.

STEP 3:
When you are done Press (Q) again and then Press (M) or click eye_icon_2 to open the “Rectangular Marquee Tool”.
Right click the area you have painted and click “Select Inverse”, Right click again and click “Layer Via Copy”.

STEP 4:
Now you have 2 layers. Select the new layer “Layer 1″.

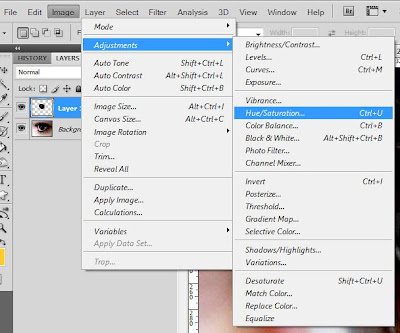
Press (Ctrl + U) or go to Image -> Adjustments -> Hue/Saturation…
Now move the “Hue” to get the desired color. You can play a little by changing the Saturation and Lightness, but mostly you dont need to edit them.

STEP 5:
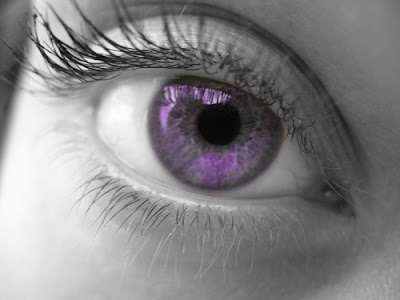
When you are happy with the color click OK, Save the image and you will have a picture that looks something like this:
I Hope you enjoyed folowing this tutorial, please leave a comment.
After this tutorial for beginners, you can create a really cool effect in just a few minutes.
End Result:


STEP 1:
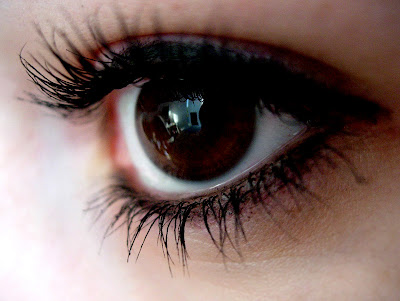
Start with opening the picture you would like to change.
These are the pictures i used for this example.


Zoom in to the eye by pressing (Z) and clicking the eye.
STEP 2:
Click (Q) to open up the “Quick Mask Mode”, and press (B) or click the brush tool brush.
Now fill the eye area you would like to change.


STEP 3:
When you are done Press (Q) again and then Press (M) or click eye_icon_2 to open the “Rectangular Marquee Tool”.
Right click the area you have painted and click “Select Inverse”, Right click again and click “Layer Via Copy”.

STEP 4:
Now you have 2 layers. Select the new layer “Layer 1″.

Press (Ctrl + U) or go to Image -> Adjustments -> Hue/Saturation…

Now move the “Hue” to get the desired color. You can play a little by changing the Saturation and Lightness, but mostly you dont need to edit them.

STEP 5:
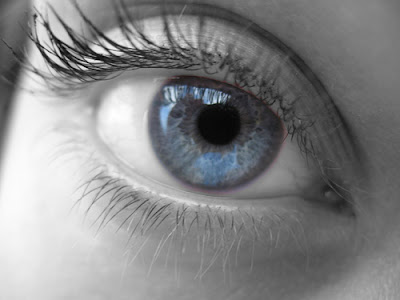
When you are happy with the color click OK, Save the image and you will have a picture that looks something like this:
I Hope you enjoyed folowing this tutorial, please leave a comment.
Categories:
Photo Retouch,
Photoshop


