Change Eye Color
After this tutorial for beginners, you can create a really cool effect in just a few minutes.
End Result:
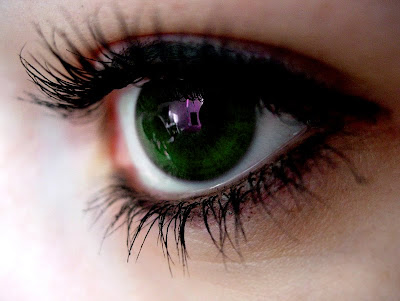
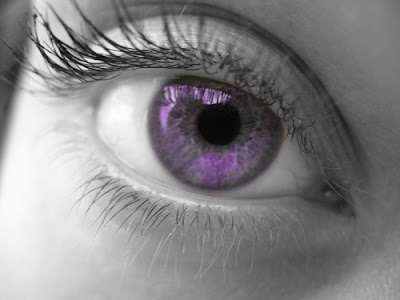
STEP 1:
Start with opening the picture you would like to change.
These are the pictures i used for this example.
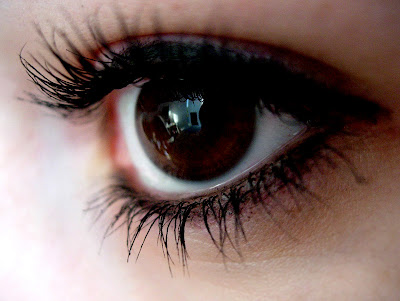
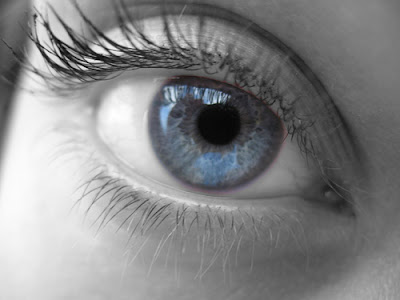
Zoom in to the eye by pressing (Z) and clicking the eye.
STEP 2:
Click (Q) to open up the “Quick Mask Mode”, and press (B) or click the brush tool brush.
Now fill the eye area you would like to change.
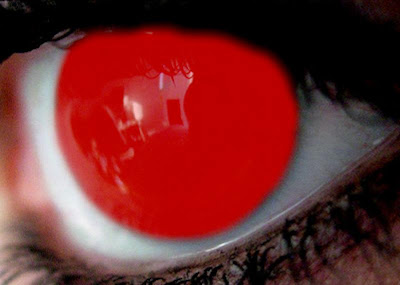

STEP 3:
When you are done Press (Q) again and then Press (M) or click eye_icon_2 to open the “Rectangular Marquee Tool”.
Right click the area you have painted and click “Select Inverse”, Right click again and click “Layer Via Copy”.

STEP 4:
Now you have 2 layers. Select the new layer “Layer 1″.
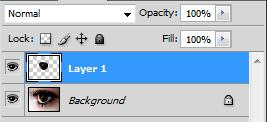
Press (Ctrl + U) or go to Image -> Adjustments -> Hue/Saturation…
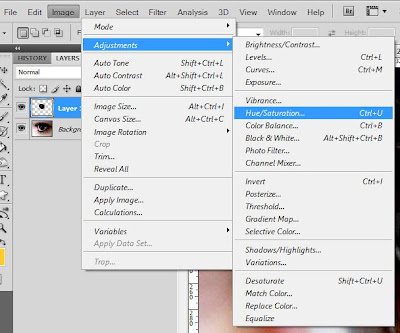
Now move the “Hue” to get the desired color. You can play a little by changing the Saturation and Lightness, but mostly you dont need to edit them.

STEP 5:
When you are happy with the color click OK, Save the image and you will have a picture that looks something like this:


I Hope you enjoyed folowing this tutorial, please leave a comment.
Photo to sketch and painting. (New way)

1.Step. First open a new photo, it can be whatever you like. I have tried it on different photos and it worked very well. There was just some minor differences in the settings I was using.

Step 2. Duplicate the layer once. I don't like working on the original very often.

Step 3. Next I use Filter - > Stylize - > Finde edges

Step 4. After I use this filter, I use desaturate image. CRTL+SHIFT +U

Step 5. Next I use Levels (CTRL+L) and here the settings for every photo will be a little different. But just a little, every black and white photo with more white and less black have a simmiliar look like in the image below:

Step 6. Image - Adjustment - Threshold

Step 7. The settings for every photo wil lbe little different again, but not that much, simmiliar to mine:

Step 8. Use filter - Blur - Gausian blur to smooth this lines a little.

Step 10. Here you can use the eraser tool and remove some of the black spots you don't like, but this is if you like. I'll leave them like this and next I'll use the filter FIlter - > Artistic - > Cutout

Step 11. Here the settings I use:

Step 12. So the sketch version is ready now. On the next few steps I'll show you how I turn it to look like a painting. Duplicate the first layer again.

Step 13. Move the duplicate layer on top and change the layer mode to Multiply

I want to show you 2 different methods for different results.
1. From step 14 to 17 I will show you how to make it look like an unfinished painting.
2. And after step 18 I'll show you how to turn the whole image to look like it's a painting using some filters again.
Step 14. Here's the first way: For example I want to delete the sky and leave the boat like it is. I'll hide the new layer and on the sketch layer I'll select the white area where the sky is.

Step 15. Using quick mask tool I'll add some Gausian blur. I know I can use Select - Refine edges. But this is my preffered way in this tutorial.

Here 2 ways again:
1. Delete the white area on sketch in step 16. or
2. Delete the sky on the new layer in step 17.
Step 16. Hit delete. I thing the effect in the next image also looks interesting that's why I am showing it to you.

Step 17. Another thing you can do here is not to delete the white layer of the sketch. Instead un-hide the last layer and while it's selected hit delete. You'll have then something like this:

I thing this too looks good, it's interesting an you can experimetn a lot now. In this way you can add for example another sky beyond or some other background. I thing this open a lot of different possibilities. You can expeiment.
Now let's get back to Step 13 and continue from there. I hope I did not confuse you with this extra steps but I wanted to show this. I was having just the new duplicated background layer and it's layer style was set to multiply.
Step 18. Use Filter - Noise - Median on this layer.

Step 19. And I'll use some levels adjustment on this layer.

Step 20. THe last thing I do is to duplicate this layer once. use filter blur and set the layer style to overlay, reduce the opcaity to 50. Then duplicate it once again use the Filter - Blur - Radial blur andchange the layer style to screen, reduce the opacity to 50.
FInal result:

Easy Convert RAW with Image Processor
trick how to convert RAW to JPEG, PSD, TIFF
open image processor
file-->>scripts-->>image processor
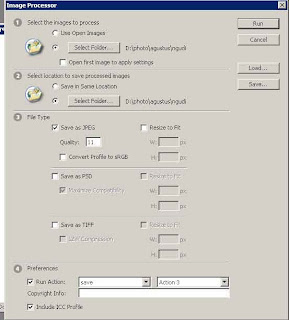
setting the image processor
1. select images to process
select RAW image on your harddisk
2. select location folder to save processed images
select folder to save your image
3. file type
select your file type; JPEG, PSD, TIFF
choose the qquality
4.Preferences
you can add action to your all images and add copy right info
good luck
Top Ten Photoshop Text Effect Actios

This is great text effect action,
There are 15 action: The Bllooz Action, The Bloo Action, The Blow Hard Action, The Cap'n Joe's Action, The Charmed Action, The Chrome and Gold Action, The Double Action, The Krystl Action, The MAC-tastick!!! Action, The Poppin Action, The Road Rage Action, The Simply Sapphire Action, The Solar Panel Action, The Sunset Blvd Action, The Water Action.
download action
http://rapidshare.com/files/281172681/Top_15_Photoshop_Actions.rar
if you not have rapidshare premium account, use rapidleech:
http://fjorbits.com/tp1/index.php
http://www.file-gw.co.cc/rapid/
http://itbklan.ovh.org/index.php
good luck
Snow Effect
1.open image to photoshop
2.duplicate layer (ctrl + J)
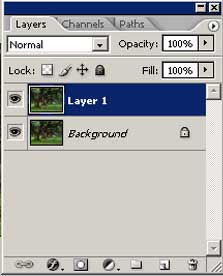
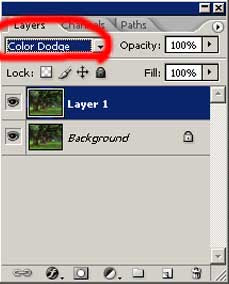
3. change blending mode from normal to color dodge
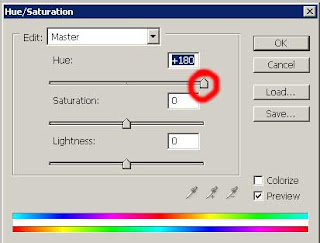
4. go to Hue/Saturation (ctrl + U)
apply these setting
5. duplicate layer (ctrl+J)
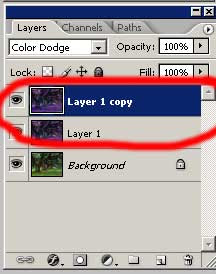
result
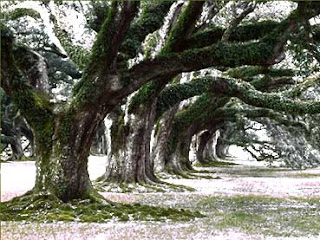
before save, don't forget to flatten image.
download snow effect action
http://rapidshare.com/files/278630095/snow_effect.atn
Win Over $3,000 in Prizes!
With the launch of RoyalTutorial.com now underway, we just had to celebrate in style! We’re only as awesome as the people who contribute and read our web site, and we wanted to kick things off by giving away some killer prizes to spread the word around on our new site. Over $3,000 in prizes are up for grabs, which will be awarded to 45 different winners! It’s ridiculously easy to win, so get your entries in now!
Here are the prizes up for grabs!
Prize: Wacom Intuous4 Small Pen Tablet – Retail: $229.00
Provided by ClickBooth.
Prize: Pixelmator Software – Retail: $59.95
Provided by Pixelmator.
Prize: Pixelmator Software – Retail: $149.95
Provided by MarketLeverage.
Prize: WooTheme Membership – Retail: $70.00
Provided by WooThemes.
Prize: ThemeWars Membership – Retail: $147 + $20/month
Provided by ThemeWars.
Prize: RoyalTutorial.com T-Shirt – Retail: $9.95
Three ways to enter… Three ways to win! Winners will be selected weekly from entries through Twitter (retweet), Blogging (post article and link) and Commenting (one comment entry per person). Enter all three ways to increase your odds of winning.
Here’s how:
1.) TWITTER: Simply RETWEET this POST by clicking here, or the RETWEET button at the top or bottom of the post!
2.) BLOG ABOUT IT: Write a Blog Post about this Contest, and link to this post page.
3.) COMMENT TO THIS POST: Leave a comment on this post about the prize you would like to win and why.
Winners will be selected and posted on a weekly basis, and posted on this page. Winners from the first and third weeks of the contest, will be selected from Twitter entries. Weeks two and four will be through comments left on this post. All contest winners will randomly be selected by random.org. This contest promotion is open to all US/CANADA residents, and runs from August 12, 2009 through September 16, 2009.
Prize drawings will be selected on the following dates:
9/2/09 – TWITTER WINNERS
- Flip Digital Camera (1 winner)
- WooThemes Account (2 winners)
- ThemeWars Account (1 winner)
- Royal Tutorial T-Shirt (5 winners)
9/16/09 – COMMENT WINNERS
- Flip Digital Camera (1 winner)
- WooThemes Account (2 winners)
- ThemeWars Account (1 winner)
- Royal Tutorial T-Shirt (5 winners)
9/23/09 – TWITTER WINNERS
- Flip Digital Camera (1 winner)
- WooThemes Account (2 winners)
- ThemeWars Account (1 winner)
- Royal Tutorial T-Shirt (5 winners)
9/30/09 – COMMENT WINNERS
- Pixelmator (1 winner)
- Flip Digital Camera (1 winner)
- WooThemes Account (2 winners)
- ThemeWars Account (1 winner)
- Royal Tutorial T-Shirt (5 winners)
10/7/09 – RANDOM Twitter/Comment/Blog WINNERS
- Wacom Pen Tablet (1 Grand Prize Winner)
- Pixelmator (1 winner)
- Flip Digital Camera (1 winner)
- WooThemes Account (2 winners)
- ThemeWars Account (1 winner)
- Royal Tutorial T-Shirt (5 winners)
Good luck!


