Tampilkan postingan dengan label Adobe Photoshop Plug In. Tampilkan semua postingan

AKVIS Sketch Quicktime Transition


In this tutorial, we are going to use AKVIS Sketch with Photoshop (CS4+) to easily create a QuickTime movie that starts out with a sketch and transitions to a full-color photo!
Materials needed:
  • Photoshop CS4+;
  • AKVIS Sketch (This tutorial assumes you have installed as a plug-in);
  • QuickTime plug-in;
  • A model photo.
Original
 
 Result
Step 1. Start with a model photo.
Step 2. With that layer active, press Ctrl + J (Windows) to quickly make a duplicate. Name the duplicate layer “Sketch.”
Step 3. With the “Sketch” layer still active, go to Filter -> AKVIS -> Sketch.
Call AKVIS Sketch plug-in
Step 4. You will now be taken to the AKVIS Sketch interface. Use the handy presets drop-down to select some nice pre-configured settings. Don’t be afraid to fine-tune the settings. I chose AKVIS Default.
AKVIS Sketch window
Step 5. Click the After tab. Aftera few moments of rendering, you will see how the image will look after the current settings are applied. If you are satisfied, click OK Sign, If not, continue to tweak the settings.
Processed image
Step 6. You will now be back in Photoshop, and the AKVIS Sketch filter will be applied to the “Sketch” layer.
Step 7. Let’s open up the Animation panel. Go to Window -> Animation.
Open up Animation panel
Step 8. If the Animation is in Timeline mode, open up the panel menu and choose Convert to Frame Animation. You will see one frame, and the thumbnail should reflect the active “Sketch” layer.
Panel menu
Step 9. You will see a time delay setting below the frame. Make sure that is set to 0.1 sec. Also, on the bottom left of the Animation panel, the Loop setting should be set to Once.
Frame settings
Step 10. Click Duplicate Selected Frame to make your second frame. Toggle off the visibility icon to the left of the “Sketch” layer in the Layers panel. The second frame in the Animations panel should now reflect the original photo layer.
Duplicate Selected Frame
Step 11. With the second frame still selected, click the Tween icon at the bottom of the Animation panel.
Tween icon
Step 12. A window will appear. Make sure to Tween With: Previous Frame. Set the Frames to Add: 10.
Tweening
Step 13. You will see that 10 frames will be added in between the two initial frames, for a total of 12 frames.
Step 14. Go to File -> Export -> Render Video.
Export
Step 15. Name your video, choose your save destination, leave the settings to default (unless you are an expert), and click Render.
Render video
Step 16. You will now have a QuickTime movie that shows your AKVIS Sketch blooming to full photographic beauty!
Final Result
 The author of this tutorial is Andre Villanueva.

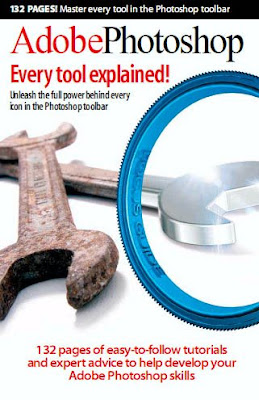
Adobe Photoshop Every Tool Explained


Every Tool Explained. There are 130 pages which are full of projects and tips on how to use Photoshop easily and how to get the best out of one of the best photo imaging programs out there.

Subjects covered in the book include:
Selection Tools in Photoshop:
Navigating and Editing Your Images
Using the Brushes and Pencil Tools
Using the Cloning and Healing Tools
The Gradient, Eraser and Fill Tools
Getting to Know the Effects Tools
Working with the Type Tool
Working with Paths, Vectors and Masks
Annotations, Notes and the Measure Tool
Creating Top Quality Artwork

Download Code:
http://rapidshare.com/files/166590495/APSExplained-www.warezwitch.com-.rar

Password:
www.warezwitch.com

Focus Magic 3.0.2 for Photoshop


Focus Magic uses advanced forensic strength deconvolution technology to literally "undo" blur and recover lost detail. It can repair both out-of-focus blur and motion blur (camera shake) in an image.

Focus Magic, which is used by many forensic scientists, is the only photo sharpening software that can recover detail. You can use this powerful tool to sharpen your blurred photos right now. Unlike other sharpening software, Focus Magic increases the "actual sharpness" (with deconvolution) rather than the "perceived sharpness" (with unsharp mask or
equivalent).

At the time that we wrote Focus Magic, we thought that it would only be used for photos that are noticeably blurred. We were surprised to find however, that nearly all photos can be sharpened with Focus Magic. A lot of our users run all their photos through Focus Magic with a Blur Width of 2. Some professional photographers have also commented that even photographs which they thought were pin sharp could still be sharpened further with Focus Magic.

Website:
http://www.focusmagic.com

Download:
http://rapidshare.com/files/102363601/fomag.rar

Genuine Fractals Print Pro 5.04 for Adobe Photoshop

The Photoshop plug-in Genuine Fractals Print Pro 5 is a revolutionary step forward for image enlargements. We've taken the industry standard and given it a complete overhaul. New scaling technology, faster performance, new features, new user interface, greater ease of use and much more. Compare Genuine Fractals Print Pro 5 to any Photoshop scaling method or other third party plug-in, Genuine Fractals Print Pro 5 is the industry standard in image resizing.

New Features:

New scaling algorithm - We overhauled the patented scaling algorithm to now allow for over 1000% enlargements with no loss in detail

Multi-processor Support - Optimized for multiple processors, including CPU hardware acceleration (SSE/AltiVec), up to 10x faster than the previous version

Document Size Presets - Crop and resize your image in a single step

Robust Layer Support - Supports Layers, Paths & Alpha Channels

Texture Controls - Get that extra bit of detail out of your images

Sharpening Controls - Save time by sharpening for output right in Genuine Fractals

Film Grain Controls - Add simulated Film Grain for and extra sharp look

Photoshop Action Support - Record actions for multiple sizes, batch process an entire folder easily

New User Interface - Make your image the star of the show, not just a bunch of dials

Support for Photoshop CS3 - Universal Binary means fast native support for Intel processor powered Macintosh systems

LAB Color Mode Support - Added Support for 8 & 16-bit LAB & Grayscale images

"Show Me How" Tutorial Videos - New built-in videos so you get the most out of Genuine Fractals

Automatic Update Checking - Make sure you always have the latest version

The Industry Standard for Image Enlargement

Genuine Fractals 5 is the industry standard for image resizing. It's renowned across the photographic and printing industries for its ability to increase image size well over 1000% without the loss of sharpness or detail that you would normally expect. Its patented, fractal based interpolation algorithms work like nothing else and the results speak for themselves.


Genuine Fractals Print Pro 5 can resize your images over 1,000% and still maintain sharp edges and minute details. It is a must for any photographer who makes large format and poster sized prints. Its also great for journalists, sports and wildlife photographers who may need to take a cropped section of an image and still make a high-quality print from it. Genuine Fractals Print Pro 5 can even work its magic with digital video still frames and even camera phone images.

Graphic designers can end the everyday problem of receiving low resolution images from clients for high resolution print work such as magazine publications or tradeshow and billboard graphics. Genuine Fractals Print Pro 5 additionally supports 8 and 16-bit CMYK images for use direct use in the pre-press workflow. Stop making blurry, artifact infected prints � get Genuine Fractals Print Pro 5.

more info @ http://www.ononesoftware.com/detail.php?prodLine_id=7

Download: Click Here