Bring Colour and Light out of Ordinary Image
Step 1
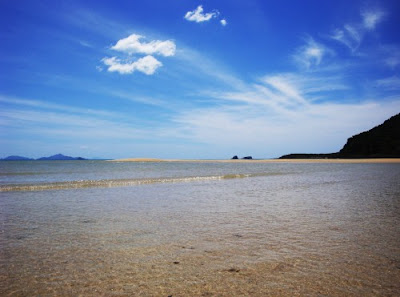
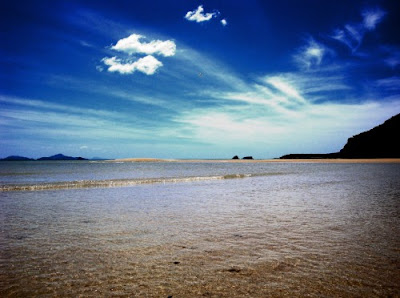
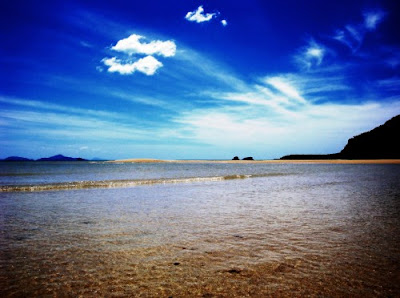
Load a photo of your choice into Photoshop. Here is mine..
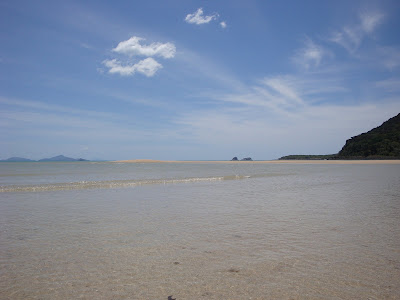
After loading your photo, duplicate the background layer five times:
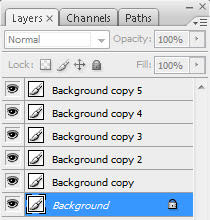
Then hide the top 4 layers and leave just the “Background copy” layer visible.
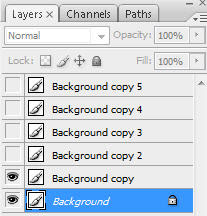
Step 2
On the “Background copy” layer, hit Ctrl + M to bring up the Curve Tool and apply the following settings:
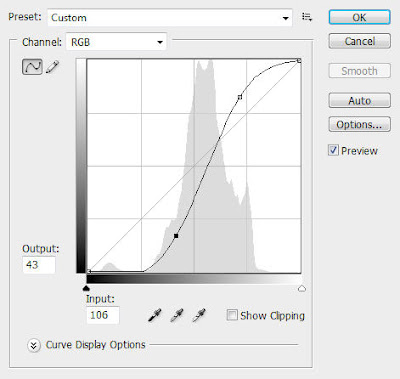
Then change the blending mode of this layer to “Overlay” with an opacity of 60%, and you will have the following image:
Step 3
Un-hide the “Background copy 2″ layer and select it, hit Ctrl + Alt + Shift key to bring up the Black and White image adjustment tool and apply the following settings:
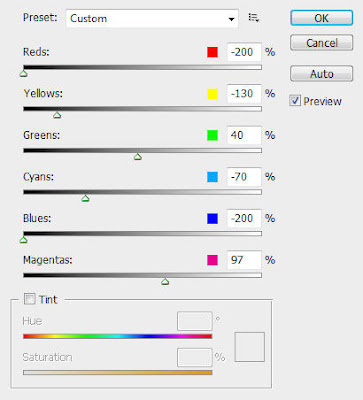
(Please note the settings may be different if you use your own photo, but the idea is to put more emphasis toward certain colours in the image and bring them out a bit more)
Change the layer blending mode to “Soft Light” with an opacity of 70%.
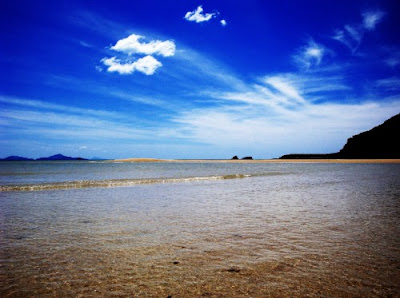
The effect so far will look like this:
Step 4
Now we can some more exposure to the image. Un-hide the “Background Copy 3″ layer and select it, go to Image > Adjustments > Exposure and apply the following settings:
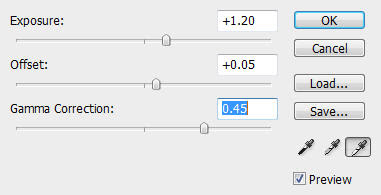
Then change the layer blending mode to “Color” and you will have the following effect:
Step 5
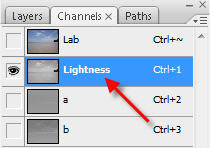
Un-hide the “Background copy 4″ layer and select it, go to Image > Mode > Lab Color and change the image mode to LAB.
The go the Channel Palette and select the “lightness” channel:
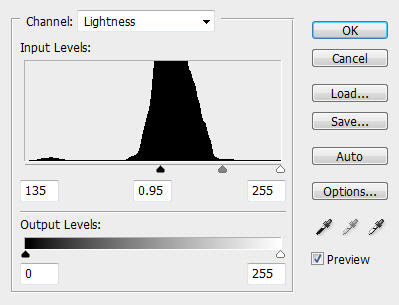
Then hit Ctrl + L to bring up the level adjustment tool, apply the following settings:
Change the image mode back to RGB mode. When you’re prompted to flatten the image, choose “Don’t Flatten”.
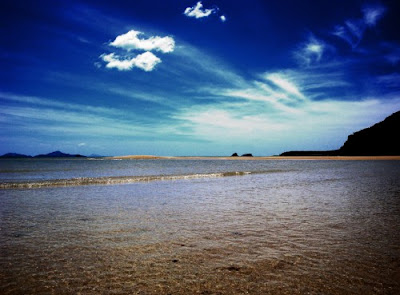
Change to layer blending option to “Soft Light” with an opacity of 50% and you will have the following effect:
Step 6
Now we can add some extra soft light onto the image.
Un-hide “Background layer 5″ and select it, go to Filter > Blur > Surface Blur and apply the following settings:
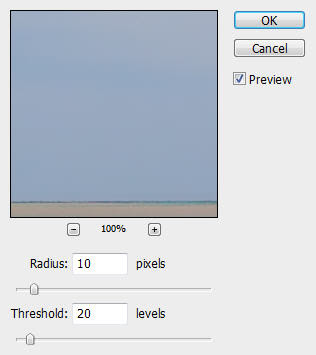
Change the layer blending mode to “Screen” with an opacity of 60% and you will have the following image:
Step 7
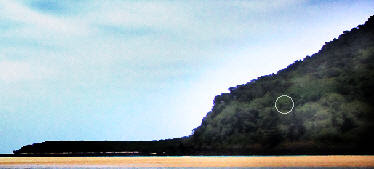
This is an optional step. As you can see after several layer blendings, the mountain on the right has become a black spot without any tree to be seen. We can bring the trees back by using the dodge tool.
Duplicate the background layer once more and put the duplicated layer just above the background layer, but beneath any other layer.
Hit “o” key to select the dodge tool, apply the following settings:

Brush over the mountain until the trees are back.
You can reduce the layer opacity a bit to get a better result, also adjust the brush size for the dodge tool if necessary.
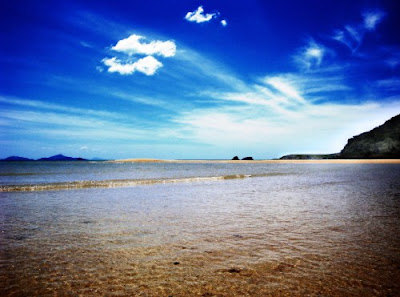
And here is the final effect:
Load a photo of your choice into Photoshop. Here is mine..

After loading your photo, duplicate the background layer five times:

Then hide the top 4 layers and leave just the “Background copy” layer visible.

Step 2
On the “Background copy” layer, hit Ctrl + M to bring up the Curve Tool and apply the following settings:

Then change the blending mode of this layer to “Overlay” with an opacity of 60%, and you will have the following image:

Step 3
Un-hide the “Background copy 2″ layer and select it, hit Ctrl + Alt + Shift key to bring up the Black and White image adjustment tool and apply the following settings:

(Please note the settings may be different if you use your own photo, but the idea is to put more emphasis toward certain colours in the image and bring them out a bit more)
Change the layer blending mode to “Soft Light” with an opacity of 70%.
The effect so far will look like this:

Step 4
Now we can some more exposure to the image. Un-hide the “Background Copy 3″ layer and select it, go to Image > Adjustments > Exposure and apply the following settings:

Then change the layer blending mode to “Color” and you will have the following effect:

Step 5
Un-hide the “Background copy 4″ layer and select it, go to Image > Mode > Lab Color and change the image mode to LAB.
The go the Channel Palette and select the “lightness” channel:

Then hit Ctrl + L to bring up the level adjustment tool, apply the following settings:

Change the image mode back to RGB mode. When you’re prompted to flatten the image, choose “Don’t Flatten”.
Change to layer blending option to “Soft Light” with an opacity of 50% and you will have the following effect:

Step 6
Now we can add some extra soft light onto the image.
Un-hide “Background layer 5″ and select it, go to Filter > Blur > Surface Blur and apply the following settings:

Change the layer blending mode to “Screen” with an opacity of 60% and you will have the following image:

Step 7
This is an optional step. As you can see after several layer blendings, the mountain on the right has become a black spot without any tree to be seen. We can bring the trees back by using the dodge tool.
Duplicate the background layer once more and put the duplicated layer just above the background layer, but beneath any other layer.
Hit “o” key to select the dodge tool, apply the following settings:

Brush over the mountain until the trees are back.

You can reduce the layer opacity a bit to get a better result, also adjust the brush size for the dodge tool if necessary.
And here is the final effect:

Ok that’s it for this tutorial! Remember you can always use the layer blending modes, curve/level tools and blur filter to bring out light and contrast for your image.
Cheers and have a nice day!
Many Thanks to www.psdvault.com


